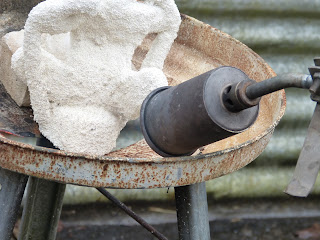
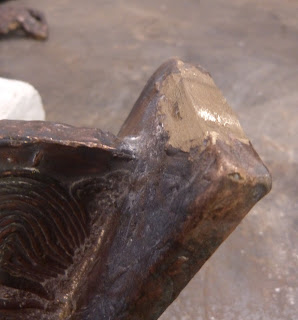
(Title image)
At this stage the moulds have been made but not solidified yet, so the first stage is to melt the Wax innards out of the moulds. This process is shown below:
Step 1: Removing the upper layer of the mould from the cup (so the Wax has somewhere to go when melted)
Removing the mould with a Stanley knife
Fully removed
Mould #2
Mould #3
Step 2: Placing the mould on a bottomless stand and firing up the blow torch
Place the mould on the stand with a pan underneath to catch the melted Wax
Turning on the gas
Lighting the blow torch
Step 3: Melting the Wax
Aim the blow torch at the bottom of the mould and turn the gas up high- this is to melt the Wax as quickly as possible to ensure the Wax doesn't expand and thus break the mould!
Ensure the mould is properly secure- notice how this one has fallen to one side
Notice how much Wax drips from the mould- ensure there are no flammable materials nearby
Slowly bring the torch upwards so the Wax all flows out (from the bottom up).
As you can see this process can be quite dangerous so make sure you wear protective clothing and stand well back
Close up
Mould #1 before
Mould #1 after
Notice that there is a crack in this section of the mould- it is important not to panic, all is not lost!
Mould #3
View of the cup to show that all Wax has been removed/melted
View of the hole from the riser to ensure air can escape when the Bronze is poured in
Step 4: Once the Wax has been removed you need to place the moulds into a Raku Kiln for about an hour to solidify each one.
Placing the moulds into the Raku Kiln
Heating the Kiln using the blow torch
View of inside the Kiln when the moulds are ready to be cooled down
Step 5: (if necessary) fixing any cracks in the moulds using air drying Ceramic cement.
You may just be able to see this hairline crack along the base of this mould.
Mould #2 which doesn't need fixing
Mould #1 with Cement
Mould #3 with Cement
Step 6: Bronze casting
Bronze Casting apparatus
Placing the mould into the sand underneath the pouring zone- it is important not to get any sand into the mould!
Adding the Bronze to the melting machine
Lighting the machine (as it is hooked up to the gas cylinder)
Waiting for the Bronze to melt
Putting the lid on once possible
Pouring away any excess Bronze (as we added too much)
Notice the Slek at the top of the molten Bronze
Close up
Removing the Slek waste material
Allowing it to cool in the sand
Checking the temperature to ensure it's ready to pour (it needs to be slightly hotter than this)
Pouring the Bronze into the mould- ensuring its one continuous stream and pouring it as fast as you can without it spilling/splashing everywhere
Molten Bronze inside mould
Bronze once it has cooled
Bronze #2 poured
Bronze #1 poured
Step 7: Breaking the mould
Once you have allowed the Bronze to cool for about ten minutes, pick it up with some tongs and chuck it in a bucket of water, allow to fizz.
Remove the mould from the water, put it on the floor and hit it with a hammer to break the mould. You will need to place it back into the water again and repeat.
You are often left with large sections of the mould that won't come off immediately.
You can see that the risers have partially formed
Notice the cup and risers on this Bronze.
Step 8: Removing the risers and the cups using an Angle Grinder
Removed risers
Accidental indentation into the base of the Bronze
Removed cup
Notice the difference in colour of the Bronze surface
Bronze #2 with risers and cup
Bronze #2 without risers
Bronze #2 without the cup
Step 9: Tidying up the Bronzes
Using a Dremel Drill to tidy up the surface
Close up of touched up areas
Dremel Drill tough head for grinding the base
Close up
Touching up an overflow Bronze area
Touching up the head where the cup was attached
Step 10: (f necessary) sorting out any un-expected imperfections
There was a fair sized hole in the base of one of my Bronzes from where an air bubble was trapped inside the mould. I filled the hole using the TIG Welder and some spare Bronze.
Using the TIG Welder
The resulting filling
Overall view
Close up
Step 11: Removing all of the mould from the Bronzes
A lot of the mould remains on the surface of the Bronzes where there are nooks and crannys. It is quite tough and difficult to remove. You often have to spend days scraping it away using a needle or a dot punch and a hammer....
Mould stuck in the nooks
Notice the white Ceramic mould on the surface
Step 12: Patternation
Once the Bronzes have been cleared up there's a big range of different shades of the Bronze on the surface. You can patternate the Bronze to make the colour more even. First you start by trying to make the surface roughly the same colour i.e. polishing up the surface to make all the Bronze bright before making it darker.
Wire head to use on the Dremel Drill
Polished up Bronze #2 front view
Polished up Bronze #2 back view
Polished up Bronze #1 Front view
Polished up Bronze #1 back view
Polished up Bronze #3 front view
Polished up Bronze #3 side view
Polished up Bronze #3 back view
Tourmaline- a cold patternation agent
Pouring some into a separate container
Painting it on
Leaving it to darken (the longer you leave it the darker it gets)
Notice the blue colour
Washing it off with Water
Patting it dry
After patternation, Bronze #1 back view
After patternation, Bronze #1 front view
Polishing it up using a Dremel drill and wire head
Polishing it up using fine grade Wire Wool
After patternation, Bronze #2
Bronze #2 polished up, front view
Bronze #2 polished up, back view
After patternation Bronze #3 front view
After patternation, Bronze #3 back view
Bronze #3 polished up, front view
Bronze #3 polished up, back view
Using Tourmaline is a quick and easy way to patternate many types of metal, however as you may have picked up from the photographs it can leave a blue colour on the surface of the metal in the areas where there are higher concentrations of Copper.
Step 13: Sealing the metal
You can seal off the surface of the metal to stop it from oxidizing further by using Bees Wax mixed with Turpentines (which makes it softer). You can apply it to the metal cold by using a brush or a Cotton rag. Alternatively if the surface of your Bronze is very dark in colour you can use Black shoe polish to seal it.
Mistakes made:
It is very easy to make mistakes when carrying out long processes. The largest mistake made from this particular run, which I will certainly learn from for the next time I do Bronze casting is pouring the Bronze too slowly into mould #3, thus the Bronze cooled whilst inside the mould and didn't fill the space completely, resulting in an incomplete cast, as shown below:
Hand just cast
Close up
Close up of the line that didn't fill.
This particular sculpture was supposed to be based from the shadow of a whole hand. As you can see only the palm, thumb and index finger was cast.
Unfortunately this is something that you only learn when you are physically doing the process. However I decided to polish this Bronze up as I have done the other two.
Here are the final photos of the Bronzes:
Bronze #1 front view
Bronze #1 side view
Bronze #1 back view
Bronze #1 side view
Bronze #2 front view
Bronze #2 side view
Bronze #2 back view
Bronze #2 side view
Bronze #3 front view
Bronze #3 side view
Bronze #3 back view
Bronze #3 side view
Bronze #3 back view close up
Close up
Thank you for reading this post. If you have any questions about the process feel free to comment. :)


